
How to Remove a Tick Safely
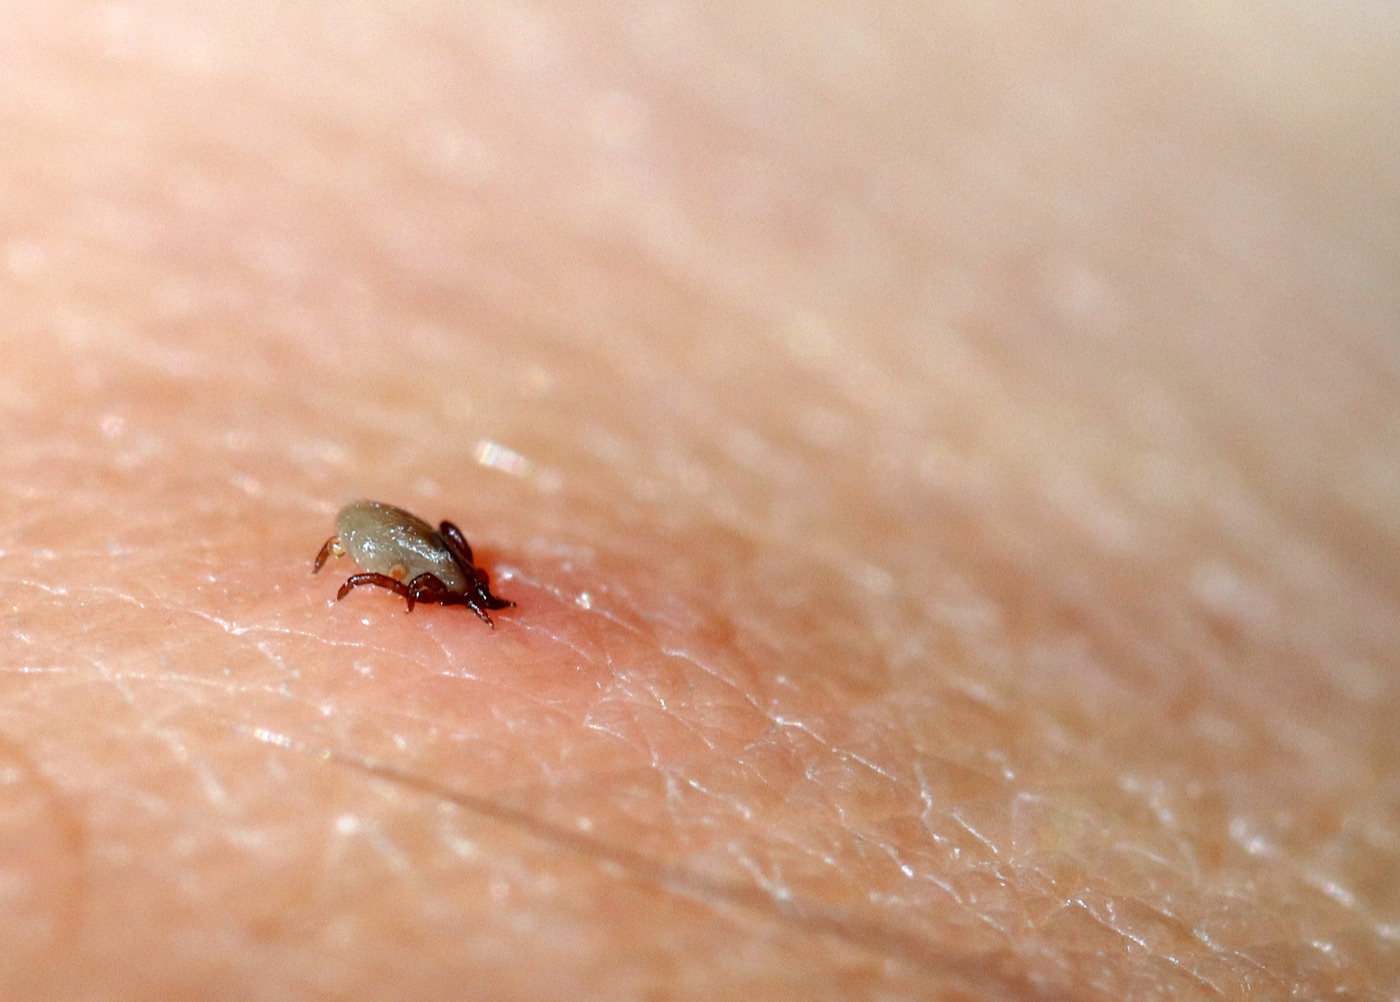
Finding an attached tick is an urgent thing, and precision is your main defense against infection. Do not wait to see a healthcare provider for extraction. Every hour the tick stays in raises the odds of disease transmission. Follow this five-step CDC-aligned protocol to remove the tick safely and minimize the risk of pathogen transfer. Your job continues after extraction: a 30-day monitoring window to catch early signs of illness.
Before you start
Gather your materials before you start: fine-tipped tweezers, rubbing alcohol or an iodine scrub, and a small, dry, sealable container or plastic bag. Fine-tipped tweezers are not the same as the blunt-tipped household or eyebrow tweezers in most bathroom drawers. Broad tools will compress the tick's body instead of isolating the head [Source: CDC].
Fine-tipped tools avoid compressing the tick's abdomen (technically the alloscutum). Squeezing the body acts like a piston, raising hydrostatic pressure in the tick's gut. That mechanical force can push infectious fluids and pathogens (including Borrelia burgdorferi, the agent of Lyme disease) from the tick's midgut directly into your bloodstream [Source: CDC].
Don't try folk methods. Never use lit matches, petroleum jelly, nail polish, or essential oils to make the tick let go [Source: CDC]. These irritants don't cause the tick to back out voluntarily. They cause respiratory distress or thermal shock, and the stress response is for the tick to regurgitate its infectious gut contents and saliva into the wound. That dramatically accelerates transmission risk [Source: CDC]. Skip the specialized twisting tools too. Twisting often severs the mouthparts and leaves them embedded in the skin [Source: UMaine Cooperative Extension].
Step 1: Grasp the tick close to the skin
Hold your fine-tipped tweezers parallel to the skin. Place the tips directly above the point where the tick's mouthparts (gnathosoma) enter the skin. Your goal is to grasp the tick as close to the skin's surface as possible [Source: CDC].
Do not grasp or squeeze the tick's body. Pressure on the midsection significantly raises the risk of mechanical pathogen transfer [Source: CDC]. Stay focused on the mouthparts right at the skin, and you avoid the piston effect that forces infected fluids into the bite.
Step 2: Pull straight upward with steady, even pressure
Once the tweezers are seated around the mouthparts, apply steady, continuous upward pressure. The motion has to be linear and perpendicular to the skin. Do not twist, jerk, or rock the tick. Linear tension lets the backward-facing barbs on the tick's feeding tube disengage gradually [Source: CDC]. Twisting introduces lateral shear forces that can snap the mouthparts and leave them embedded in the skin [Source: UMaine Cooperative Extension].
If the mouthparts break off, make one gentle attempt to remove the fragments with your tweezers. If they don't come out easily, leave them alone and let the skin heal. Retained mouthparts are non-viable chitinous structures. They don't contain salivary glands or midgut tissue, so they can't transmit disease. Your body will eventually push them out as the wound heals [Source: CDC].
Step 3: Clean the bite area and your hands
Once the tick is out, sanitize right away to prevent a secondary bacterial infection at the site. Clean the bite, your hands, and the tweezers thoroughly with rubbing alcohol, an iodine scrub, or soap and warm water for at least 20 seconds [Source: CDC]. Sanitizing the tools also prevents cross-contamination if you use them again later.
Want to know when tick activity peaks in your state?
See the local forecastStep 4: Save or kill the tick correctly
Once the tick is out, handle it properly so it can't re-attach and so you don't expose yourself to its pathogens.
To kill the tick. If you don't plan to have it tested, dispose of it by submerging in rubbing alcohol, sealing it in a bag, wrapping it tightly in tape, or flushing it down the toilet [Source: Alpha-gal Information]. Never crush a tick with bare fingers. Pathogens in its internal fluids can enter your system through tiny abrasions in the skin [Source: CDC].
To save the tick. Preservation is recommended in Lyme-endemic areas or for high-risk bites. Seal the tick in a dry, crush-proof container or plastic zipper bag. Label it with the date of extraction and the location of the bite on your body. Store in the refrigerator if it's alive, or the freezer if dead, to preserve its DNA for testing [Source: Alpha-gal Information].
| Laboratory | Geographic eligibility | Resident cost | Turnaround time |
|---|---|---|---|
| TickReport (UMass) | Nationwide | $50 – $200 | 3 business days |
| PA Tick Research Lab | Pennsylvania residents | Free (basic) | Within 72 hours |
| CT CAES Lab | Connecticut (human-fed only) | Free | First-come, first-serve |
| UMaine Tick Lab | Maine residents | $20 flat rate | 3 business days |
Step 5: Mark the date and monitor for 30 days
Document the exact date of the bite and your best estimate of how long the tick was attached. Then monitor closely for 30 days. The incubation period for most tick-borne pathogens runs 3 to 30 days [Source: Penn Medicine].
Watch for a localized rash during this window. The most common indicator of Lyme disease is Erythema migrans (EM). This rash typically appears at the bite site and is round or oval-shaped. It often shows up as a bull's-eye with a clear center, but it can also be a solid red or purple disc [Source: Penn Medicine]. The rash is absent in 20 to 30% of confirmed Lyme cases, so a lack of rash does not mean you're in the clear.
Watch for systemic signs of infection too: fever, chills, fatigue, headache, muscle or joint pain, swollen lymph nodes [Source: CDC]. Neurological symptoms (facial palsy, severe neck stiffness) require immediate medical attention. If a rash appears, photograph it with a date.
When to seek medical care
Get a professional medical evaluation if any of these red flags or risk criteria apply:
- A rash appearing at the bite site within 30 days, especially if it expands.
- Fever, chills, or persistent body aches within 30 days of the bite [Source: CDC].
- The tick was attached for more than 24 hours in a Lyme-endemic region.
- The tick was identified as a black-legged (Ixodes scapularis) tick.
- You can't remove the tick yourself.
- Any unusual symptom in the 30 days after the bite, even if you're not sure it's related.
For high-risk exposures, a provider may prescribe post-exposure prophylaxis (PEP), typically a single 200mg dose of doxycycline. CDC and IDSA guidelines recommend this treatment only when all of the following criteria are met [Source: Penn Medicine]:
- Identified adult or nymphal Ixodes scapularis.
- Attached for at least 36 hours (based on engorgement or observation).
- Treatment started within 72 hours of removal.
- Local tick infection rate is 20% or higher.
- No medical contraindications exist.
What if the tick was on my pet?
If you find a tick on a dog or cat, the removal technique is the same as on a human. Use fine-tipped tweezers to grasp the mouthparts close to the skin and pull upward with steady, linear pressure.
Monitor your pet for two to three weeks for non-specific signs of illness: lethargy, loss of appetite, fever, or shifting-leg lameness (joint pain that moves from one limb to another). Pets don't develop the bull's-eye rash you see in humans. If you notice changes in your pet's energy or gait, get them to a vet right away. Pets need specialized diagnostics, and a human physician isn't the right person to treat them.
Frequently asked questions
How long does a tick need to be attached to transmit Lyme disease?
In most cases, a black-legged (deer) tick has to be attached for 36 to 48 hours before Borrelia burgdorferi bacteria can be transmitted [Source: Penn Medicine]. The risk of Lyme disease is very low if the tick is removed within 24 hours [Source: CDC].
What does a tick look like after it has been feeding?
A fed tick is engorged. It shifts from a flat, paper-thin shape to a rounded, globular one, roughly 5 to 10 times its unfed size. The color usually changes from reddish-brown to a dull gray or silver-blue as the midgut fills with blood.
Should I get tested for Lyme disease after every tick bite?
No. Testing immediately isn't useful because of the "antibody lag." Standard tests measure your immune response, and it typically takes two to six weeks for the body to produce measurable antibody levels. Testing without symptoms is not recommended.
Is the bull's-eye rash always present in early Lyme disease?
No. The classic bull's-eye rash occurs in roughly 70 to 80% of Lyme disease cases. Because it is not always present, the absence of a rash does not rule out infection.
Can I get Lyme disease from a tick bite even if I removed it within an hour?
The risk of Lyme disease is clinically negligible if the tick is removed within an hour. That said, a few rare pathogens can transmit in as little as 15 minutes, so rapid removal is always the priority.
Do lone star tick or dog tick bites transmit Lyme disease?
No. Only black-legged ticks transmit Lyme. Lone star ticks can spread ehrlichiosis and have been linked to alpha-gal syndrome, a mammalian meat allergy [Source: NYC Health]. American dog ticks can spread Rocky Mountain spotted fever and are generally larger than deer ticks, roughly the size of a pea [Source: NYC Health].
Want to know when tick activity peaks in your state?
Enter your ZIP code or town below to see your local forecast.
Sources
- CDC: What to Do After a Tick Bite
- CDC: Tick Bite — What to Do (PDF)
- CDC Yellow Book 2026: How to Remove a Tick
- University of Maine Cooperative Extension: Tick Removal
- Penn Medicine: Lyme Disease — Symptoms and Causes
- Alpha-gal Information: What to Do If You Are Bitten by a Tick
- NYC Health: Ticks
- UMass Amherst: TickReport